
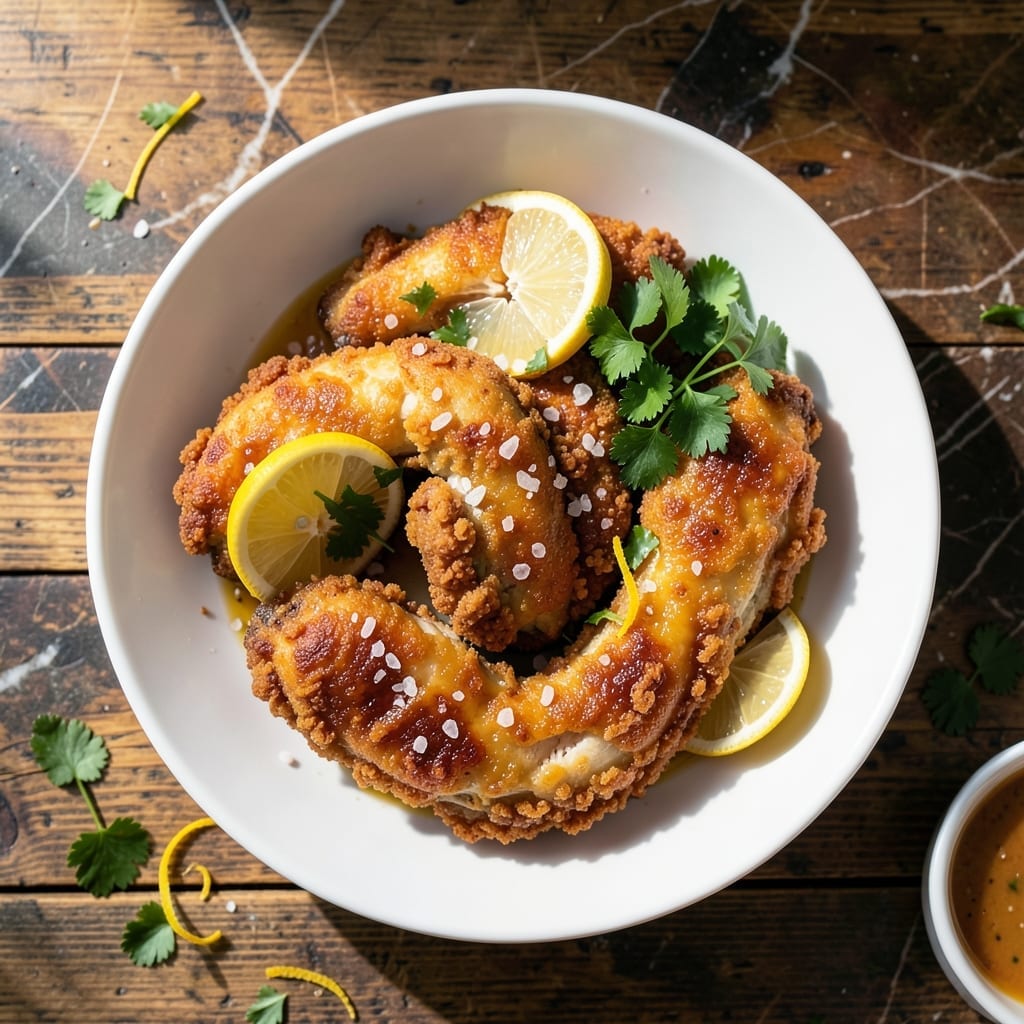
Achieving crispy battered chicken at home is easier than you think with the right technique. The secret lies in a hot oil bath and a light, airy batter that transforms into a golden shell upon frying.
I’ve tested countless methods to perfect this dish, focusing on maintaining a tender interior while ensuring the exterior stays shatteringly crispy. The key is using ice-cold liquid in the batter, which creates a protective barrier against the hot oil.
This method guarantees a consistent crunch in every bite, with juicy meat underneath. The batter puffs up beautifully, locking in moisture while delivering that irresistible texture.
Serve it fresh for the best experience, when the crust is at its peak crispiness and the chicken is perfectly tender.
Ingredients for Crispy Battered Chicken
A handful of pantry staples and one clever technique yield this irresistible dish.
| Ingredient | Amount | Notes |
|---|---|---|
| Chicken Thighs 🍗 | 2 lb | Boneless, skinless, cut into strips |
| All-Purpose Flour 🌾 | 2 cups | For the batter base |
| Cornstarch 🌽 | ½ cup | For extra crispiness |
| Baking Powder 🧂 | 1 tbsp | Makes batter light and airy |
| Ice-Cold Sparkling Water 💧 | 1 ½ cups | Creates protective barrier in batter |
| Salt 🧂 | 1 ½ tsp | Divided for chicken and batter |
| Black Pepper 🌶️ | 1 tsp | Freshly ground preferred |
| Garlic Powder 🧄 | 1 tsp | For aromatic depth |
| Onion Powder 🧅 | 1 tsp | Balances savory notes |
| Paprika 🌶️ | 1 tsp | Sweet or smoked variety |
| Vegetable Oil 🫒 | 4 cups | For deep frying (peanut or canola work too) |
| Large Egg 🥚 | 1 whole | Helps batter adhere to chicken |
The chicken quality is non-negotiable here. Thighs outperform breasts—more flavor, juicier results, and they hold up to the hot oil better. Source air-chilled, antibiotic-free from Whole Foods or your local butcher for best texture. The cornstarch is key for that shatteringly crispy coating, so don’t skip it. For the oil, vegetable or peanut oil (with its high smoke point) is ideal.
No sparkling water? Ice-cold beer adds similar effervescence and depth. For a gluten-free version, swap the all-purpose flour for a 1:1 gluten-free blend. The baking powder can be omitted in a pinch, but the batter won’t puff as dramatically. Egg can be replaced with aquafaba or flax egg for binding, though the crust may be slightly less crisp.
Fry in batches to avoid crowding—this keeps the oil temp steady for that golden finish. Leftovers (if any) reheat best in a toaster oven at 400°F for 8-10 minutes. The battered chicken is best served immediately but holds its crunch for 24 hours stored properly.
Why You’ll Love This Recipe
- One Bowl Wonder: I just dump flour, cornstarch, and ice-cold sparkling water in a bowl—no fancy steps, and the baking powder does all the lifting.
- Shatteringly Crisp: That first bite through the crackling shell into the juicy thigh? Honestly, I make extra just to snack on the bits left in the pan.
- Feeds a Crowd Fast: I’ve served this at birthday parties and Tuesday dinners alike—everyone from picky kids to skeptical uncles goes back for more.
- Leftovers? Still Great: Cold from the fridge the next day, the coating stays crunchy enough to revive in the air fryer for a 5-minute lunch.
Step-by-Step Instructions for Crispy Battered Chicken
Master the technique for achieving that perfect golden crunch while keeping the meat juicy.
Step 1: Season and Prepare the Chicken
Pat the 2 lb Chicken Thighs completely dry with paper towels. This step is non-negotiable—moisture prevents the batter from adhering properly and can cause oil splatter during frying.
Cut the chicken into 1-inch thick strips, then season evenly with ½ tsp Salt, 1 tsp Black Pepper, 1 tsp Garlic Powder, 1 tsp Onion Powder, and 1 tsp Paprika. Let the seasoned chicken rest at room temperature for 10 minutes while you prepare the batter.
Step 2: Create the Crispy Batter
In a large bowl, whisk together the 2 cups All-Purpose Flour, 0.5 cup Cornstarch, 1 tbsp Baking Powder, and remaining 1 tsp Salt. The cornstarch is your secret weapon—it creates an ultra-crispy exterior that stays crunchy longer.
Make a well in the center and add the 1 whole Large Egg and 1.5 cups Ice-Cold Sparkling Water. Whisk until just combined—the batter should be thick but pourable, with small lumps remaining. The carbonation in the sparkling water creates tiny air pockets in the batter, resulting in a lighter, crispier coating. Don’t overmix or the batter will become tough.
Step 3: Fry to Golden Perfection
In a deep, heavy-bottomed pot or Dutch oven, heat the 4 cups Vegetable Oil to 350°F. Use a deep-fry or candy thermometer to monitor the temperature—this is critical for achieving that perfect golden crunch without overcooking the chicken.
Dip each piece of chicken into the batter, letting any excess drip off, then carefully lower it into the hot oil. Don’t overcrowd the pot—fry in batches if necessary to maintain the oil temperature. Fry for 6-8 minutes until the coating is deep golden brown and the internal temperature reaches 165°F.
Step 4: Drain and Keep Warm
Using a slotted spoon or tongs, transfer the fried chicken to a wire rack set over a baking sheet lined with paper towels. The wire rack allows air to circulate around the chicken, preventing it from becoming soggy on the bottom. Let it drain for 1-2 minutes.
If frying in batches, keep the finished chicken warm in a 200°F oven while you fry the remaining pieces. This ensures all your chicken stays hot and crispy until serving. Serve immediately while still hot and at its crispiest, with your favorite dipping sauce on the side.
Pro Tips For Making Crispy Battered Chicken
- Chill the Chicken: Pat the thighs dry, then let them sit in the fridge uncovered for 20 minutes before battering—I learned this the hard way after my first batch turned soggy from condensation.
- Ice-Cold Water Only: Use sparkling water straight from the fridge, and measure it last so it stays as cold as possible; warm liquid makes the batter dense instead of light and crispy.
- Double Fry for Crunch: Fry once at 350°F until golden, rest 5 minutes, then fry again at 375°F for 2 minutes—this is the only way to get that shatteringly crisp shell without overcooking the meat.
- Skip the Overmixing: Stir the batter just until it comes together, even if it looks lumpy; overworking develops gluten and turns your light, airy coating into a chewy mess.
Pro Cooking Tips for This Recipe
Oil Temperature Control
Maintaining consistent 350°F oil temperature is non-negotiable. Use a deep-fry thermometer like Taylor Precision for accuracy. If the oil dips below 325°F, your coating will absorb grease and turn soggy. 🌡️
Batter Consistency
The batter should coat the back of a spoon but still drip slowly. If too thick, add 1-2 tbsp more ice-cold sparkling water. Too thin? Whisk in 1-2 tbsp more flour. I find a wooden chopstick works best for testing consistency.
Double Frying Secret
For restaurant-level crispiness, try double frying. First fry at 325°F for 4 minutes, rest 2 minutes, then fry again at 375°F for 2-3 minutes. This creates an ultra-crispy exterior while keeping the meat juicy.
Avoid Overcrowding
Fry in small batches—never more than 4-5 pieces at once in a standard Dutch oven. Overcrowding lowers oil temperature dramatically. I use a 12-inch cast iron skillet for better heat retention when frying smaller batches.
Keep cooked pieces warm on a wire rack in a 200°F oven while finishing the batch.
Rest Before Serving
Let fried pieces rest 1-2 minutes on a wire rack before serving. This allows the coating to set fully. The rack prevents steam from making the bottom soggy—never drain directly on paper towels. 💡
Nutrition Facts
Frequently Asked Questions
Why use sparkling water in the batter?
The carbonation creates air pockets that make the coating lighter and crispier. Ice-cold liquid also prevents the batter from cooking too quickly in hot oil.
How do I keep the coating from falling off?
Pat chicken completely dry and let it rest after seasoning. Use ice-cold batter and avoid overmixing to help it adhere better.
Can I bake instead of fry?
Yes, but results differ. Bake at 400°F for 20-25 minutes on a wire rack. The texture won’t be as crispy as frying, but it’s a healthier option.
What oil works best for frying?
Use oils with a high smoke point like vegetable, peanut, or canola oil. Avoid olive oil as it can burn at 350°F.

- Jollof Rice Sauce Recipe: West African Tomato and Spice Infusion - September 25, 2026
- Japanese Rice Soup Recipe: Umami-Rich Comfort in a Bowl - September 25, 2026
- Homemade Cream Of Rice Recipe: Silk-Smooth Breakfast in Minutes - September 25, 2026