
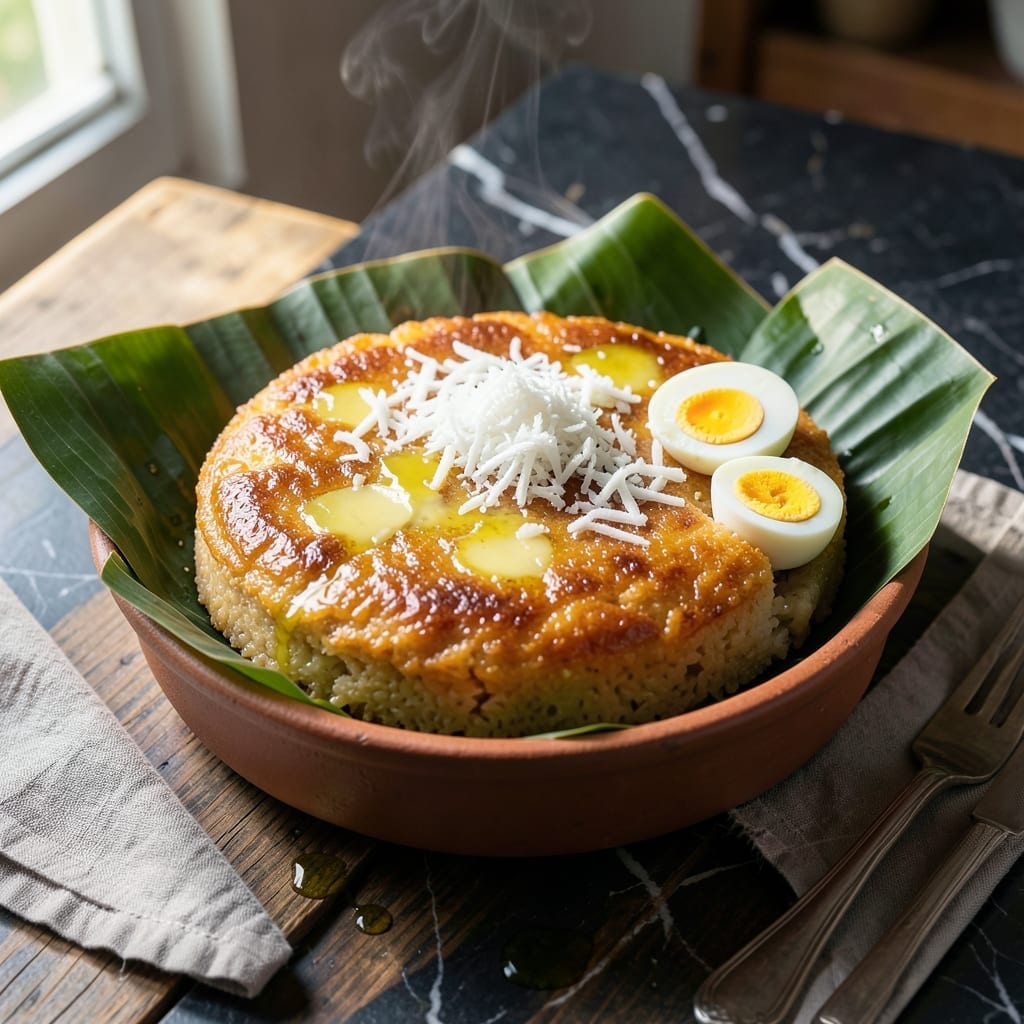
This traditional Filipino dish brings the authentic taste of clay pot cooking to your kitchen. Glutinous rice creates the signature chewy texture that defines bibingka.
Prepared with simple ingredients and traditional techniques, this recipe delivers the same rich, slightly sweet flavor found in Philippine markets. The top develops a golden crust while staying soft inside.
Ingredients for Glutinous Rice Bibingka Recipe Panlasang Pinoy
Traditional Filipino ingredients deliver authentic clay pot flavor with chewy texture and golden crust.
| Ingredient | Amount | Notes |
|---|---|---|
| Glutinous Rice Flour 🌾 | 2 cups | Also called sweet rice flour |
| Granulated Sugar 🍚 | ¾ cup | White or brown sugar works |
| Coconut Milk 🥥 | 1 ½ cups | Full-fat for richness |
| Large Eggs 🥚 | 4 whole | Room temperature preferred |
| Unsalted Butter 🧈 | ½ cup | Melted for batter |
| Baking Powder 🧂 | 1 tbsp | Ensures proper rise |
| Vanilla Extract 🌿 | 1 tsp | Pure vanilla for best flavor |
| Salt 🧂 | ½ tsp | Balances sweetness |
| Freshly Grated Coconut 🥥 | ½ cup | For topping texture |
| Sliced Salted Egg 🥚 | 2 whole | Traditional garnish |
| Grated Edam Cheese 🧀 | ½ cup | For savory contrast |
| Banana Leaves 🍃 | 2 pieces | For authentic clay pot aroma |
The glutinous rice flour is non-negotiable—look for sweet rice flour at Asian markets or the international aisle. Filipino brands like Mochiko are ideal. Coconut milk should be full-fat (lite versions lack richness). For authentic presentation, banana leaves add the signature aroma—find them frozen at most Asian grocers. The eggs provide structure, so don’t skip them.
No banana leaves? Parchment paper works in a pinch (but lacks the traditional scent). Swap salted eggs for hard-boiled eggs or omit entirely. Edam cheese can be replaced with cheddar or kesong puti for a more local touch. For a lighter version, reduce sugar by half—the coconut milk provides natural sweetness.
Store dry ingredients in airtight containers for 6-12 months. The baked bibingka keeps at room temperature for 2 days or refrigerated for 5 days. Reheat in a steamer or microwave to restore the soft texture before serving.
Why You’ll Love This Recipe
- One Bowl Wonder: I just dump all the dry ingredients first, then whisk in the coconut milk and eggs—no fancy steps, no extra bowls.
- Rich Coconut Magic: That first bite with the buttery crust and creamy coconut base? Honestly, I could eat the whole pan.
- Festive or Friday: It’s my Christmas morning tradition, but I’ll be real—it’s also my lazy Sunday brunch.
- Stretches Easily: A batch feeds my family of six with leftovers, and the ingredients cost less than my old cake recipes.
Step-by-Step Instructions for Glutinous Rice Bibingka
Master the traditional technique for this beloved Filipino clay pot cake with authentic preparation.
Step 1: Prepare the Banana Leaves and Preheat
Begin by briefly passing the 2 pieces Banana Leaves over an open flame to soften them, then wipe clean with a damp cloth. This step releases their aromatic oils, essential for authentic clay pot flavor. Line a 9×13-inch baking pan with the prepared leaves, ensuring full coverage.
Preheat your oven to 375°F. The high initial temperature creates the characteristic crisp edges while maintaining a custardy center. I always check my oven with a thermometer—many run 25°F cooler than their setting, which can affect the bake.
Step 2: Create the Batter Base
In a large mixing bowl, whisk together the 2 cups Glutinous Rice Flour, 0.75 cup Granulated Sugar, 1 tbsp Baking Powder, and 0.5 tsp Salt until fully incorporated. The baking powder ensures proper rise in this dense flour, while the salt balances the sweetness perfectly.
Make a well in the center and add the 4 whole Large Eggs, 1.5 cups Coconut Milk, 0.5 cup Unsalted Butter (melted and cooled), and 1 tsp Vanilla Extract. Whisk from the center outward until you achieve a smooth, lump-free batter with the consistency of heavy cream.
Step 3: Bake Until Golden and Set
Pour the batter over the banana leaves in your prepared pan, spreading evenly. Bake at 375°F for 25 minutes, then reduce the temperature to 350°F and continue baking for 20-25 minutes more. The initial high heat sets the edges while the lower finish prevents over-browning.
You’ll know it’s ready when the center no longer jiggles and a toothpick inserted comes out with just a few moist crumbs. The top should be golden brown with a slight crust, and the aroma will fill your kitchen with that unmistakable bibingka scent.
Step 4: Add Toppings and Finish
Remove from the oven and immediately sprinkle the 0.5 cup Grated Edam Cheese evenly over the top. Return to the 350°F oven for 3-5 minutes until the cheese melts completely and turns slightly golden at the edges. This creates that signature savory contrast to the sweet cake.
Arrange the 2 whole Sliced Salted Egg on top in an decorative pattern, then sprinkle with the 0.5 cup Freshly Grated Coconut. The residual heat will lightly toast the coconut, adding texture and visual appeal. Let rest for 10 minutes before slicing to allow the cake to set fully.
Pro Tips For Making Glutinous Rice Bibingka Recipe Panlasang Pinoy
- Preheat the Oven: Set your oven to 375°F (190°C) and let it fully heat before baking—this guarantees even cooking and prevents a gummy center.
- Room Temp Eggs: Take your eggs out 30 minutes beforehand; they blend smoother into the batter and give the bibingka a lighter texture.
- Don’t Overmix: Stir the batter just until combined—overmixing develops gluten in the flour, making your bibingka dense instead of tender.
- Butter the Pan Well: Grease your baking dish thoroughly with unsalted butter, including the edges, to prevent sticking and add a rich, golden crust.
Essential Equipment for Perfect Results
Clay Pot Essentials
For authentic bibingka, a terracotta clay pot is traditional, but a 9×13-inch baking pan works perfectly. I use Lodge cast iron for even heat distribution. The clay pot imparts a unique earthy flavor that’s hard to replicate. 🔥
Banana Leaf Prep
You’ll need 2 pieces banana leaves for lining. Pass them over an open flame to soften, then wipe clean. This releases aromatic oils essential for the dish’s signature scent. Find these frozen at most Asian grocers.
Mixing Tools
A large mixing bowl and whisk are crucial for combining the glutinous rice flour batter smoothly. I prefer a stainless steel whisk—it handles the thick batter better than silicone. Ensure no lumps remain for perfect texture.
Oven Thermometer
Oven temperatures often run inaccurate. I always use a Taylor oven thermometer to verify my 375°F setting. This ensures consistent results, especially for the initial high-heat phase that sets the edges.
Topping Tools
For the traditional toppings, a box grater works best for the Edam cheese and coconut. A sharp knife is essential for clean salted egg slices. These small tools make a big difference in presentation.
Serving ware
Use a bamboo steamer to keep your creation warm if not serving immediately. This maintains the soft texture while preventing the top from drying out. I also love presenting it on a banana leaf-lined platter for authenticity. ✨
Nutrition Facts
Frequently Asked Questions
Can I use regular rice flour instead of glutinous?
No, regular rice flour won’t give the same chewy texture. Glutinous rice flour is essential for authentic bibingka. It creates the signature sticky, dense consistency that defines this dish.
Why do we use banana leaves?
Banana leaves release aromatic oils that infuse the cake with a subtle, earthy fragrance. They also prevent sticking and add to the traditional clay pot experience. Find them frozen at Asian markets.
Can I bake this without toppings?
Yes, but the toppings add authentic flavor and texture. Salted egg and Edam cheese create the classic sweet-savory contrast. You can omit them, but they’re highly recommended.
How do I store leftovers?
Keep at room temperature for 2 days or refrigerate for up to 5 days. Reheat in a steamer or microwave to restore the soft texture before serving.

- Gobi Fried Rice Recipe: Spiced Cauliflower Wok Delight - October 8, 2026
- Glutinous Rice Roll Recipe: Chewy Pillows With Savory Fillings - October 8, 2026
- Garlic Jasmine Rice Recipe: Fragrant Grains with Aromatic Depth - October 8, 2026