
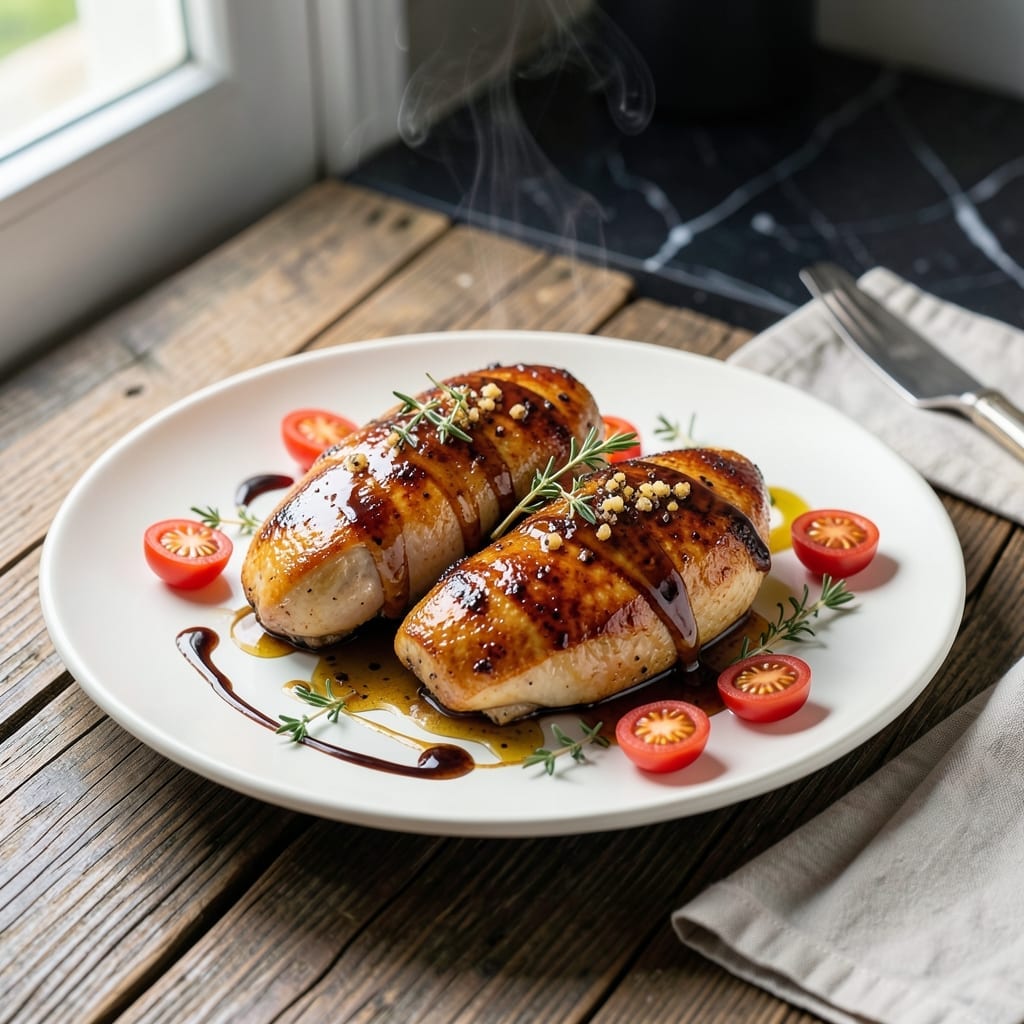
This dish delivers perfect balance between sweet and tangy flavors with minimal effort. The honey balsamic glaze caramelizes beautifully on the chicken, creating an irresistible sheen.
The secret lies in reducing the glaze to the right consistency before coating the chicken. This ensures every bite is packed with rich, complex flavor without being overly sweet.
You’ll achieve restaurant-quality results with tender chicken and a glossy, finger-licking sauce. The glaze also works wonderfully with roasted vegetables for a complete meal.
Ready in under an hour, this recipe is ideal for weeknight dinners or impressive enough for guests.
Ingredients for Honey Balsamic Chicken
Restaurant-quality ingredients create that perfect sweet-tangy balance with minimal effort and maximum flavor.
| Ingredient | Amount | Notes |
|---|---|---|
| Boneless Skinless Chicken Breasts 🍗 | 1 ½ lb | Pounded to even thickness |
| Honey 🍯 | ⅓ cup | Raw or pure preferred |
| Balsamic Vinegar 🍷 | ⅓ cup | Aged for depth of flavor |
| Soy Sauce 🥢 | 2 tbsp | Low-sodium recommended |
| Garlic Cloves 🧄 | 4 cloves | Minced finely |
| Dijon Mustard 🥄 | 1 tbsp | Smooth variety for consistency |
| Extra-Virgin Olive Oil 🫒 | 2 tbsp | Divided for cooking and glaze |
| Dried Thyme 🌿 | 1 tsp | Crushed between fingers |
| Dried Rosemary 🌿 | 1 tsp | Crushed for better infusion |
| Salt 🧂 | 1 tsp | Diamond Crystal kosher preferred |
| Black Pepper 🌶️ | ½ tsp | Freshly ground for best flavor |
| Chicken Broth 🍲 | ¼ cup | Low-sodium for balance |
| Cornstarch 🌾 | 1 tsp | For thickening the glaze |
The chicken quality is paramount. Boneless, skinless breasts from Whole Foods or your local butcher ensure tenderness. Pounding to even thickness (about ½-inch) guarantees uniform cooking. For the vinegar, aged balsamic from Trader Joe’s offers exceptional depth without the premium price of specialty imports. Always check labels for added sugars in pre-mixed products.
Substitutions are straightforward: chicken thighs (bone-in for more flavor) work beautifully, though cooking time increases by 5-7 minutes. No honey? Maple syrup at a 1:1 ratio achieves similar sweetness. For a gluten-free version, tamari replaces soy sauce seamlessly. Fresh herbs can substitute dried at a 3:1 ratio, but dried are more reliable for consistent flavor.
The glaze can be made 2 days ahead and reheated gently before use. Cooked chicken keeps for 4 days refrigerated in an airtight container. For longer storage, freeze the glaze separately for up to 3 months—thaw and reheat before coating freshly cooked chicken.
Why You’ll Love This Recipe
- One Pan Wonder: I toss everything in a skillet and let the honey and balsamic do the work—no fancy techniques required.
- Sweet & Tangy: That first bite with the sticky glaze from the honey and vinegar? I make it just to have leftovers.
- Meal Prep Hero: I cook a big batch on Sunday and it tastes just as good reheated for lunches all week.
- Budget Friendly: Chicken breasts and pantry staples like soy sauce and garlic mean I can make this without a big grocery run.
Step-by-Step Instructions for Honey Balsamic Chicken
Master the technique for restaurant-quality results with this foolproof method.
Step 1: Pound and Season the Chicken Breasts
Place the 1.5 lb boneless skinless chicken breasts between plastic wrap and pound to an even ½-inch thickness using a meat mallet. This ensures uniform cooking and prevents dry, overdone edges while the center finishes.
Season both sides with the 1 tsp salt and 0.5 tsp black pepper, pressing gently so the seasoning adheres. I always use Diamond Crystal kosher salt for its clean flavor and consistent texture. The even thickness and proper seasoning at this stage set the foundation for perfectly cooked chicken.
Step 2: Sear the Chicken to Golden Perfection
Heat 1 tbsp extra-virgin olive oil in a large skillet over medium-high heat until shimmering. Add the chicken and cook undisturbed for 4-5 minutes per side until golden brown and the internal temperature reaches 160°F.
The key here is patience—don’t move the chicken until it releases easily from the pan. This develops a proper crust and prevents steaming. Transfer the chicken to a plate and tent loosely with foil to keep warm while you prepare the glaze.
Step 3: Create the Honey Balsamic Glaze
In the same skillet, reduce heat to medium and add the remaining 1 tbsp extra-virgin olive oil. Sauté the 4 cloves minced garlic cloves for 30 seconds until fragrant, then pour in the 0.33 cup balsamic vinegar, 0.33 cup honey, 2 tbsp soy sauce, and 1 tbsp Dijon mustard.
Add the 1 tsp dried thyme and 1 tsp dried rosemary (crushed between your fingers to release their oils) and stir to combine. Simmer for 3-4 minutes until the mixture reduces slightly and the flavors meld. The glaze should coat the back of a spoon with a glossy sheen.
Step 4: Thicken and Finish the Sauce
In a small bowl, whisk the 1 tsp cornstarch with the 0.25 cup chicken broth until smooth. Pour this slurry into the skillet with the glaze and stir constantly for 1-2 minutes until the mixture thickens enough to coat the back of a spoon.
Return the chicken to the skillet, spooning the glaze over each piece to coat evenly. Cook for an additional 1-2 minutes to heat through and allow the flavors to penetrate the chicken. The glaze should be thick enough to cling to the chicken without running off.
Step 5: Rest and Serve
Transfer the chicken to a serving platter and let it rest for 3-5 minutes. This brief rest allows the juices to redistribute, ensuring each bite is moist and flavorful. Spoon any remaining glaze from the pan over the top before serving.
Garnish with fresh herbs if desired, though the dish stands perfectly on its own. The chicken should have a glossy, caramelized exterior with tender, juicy meat inside. Serve immediately while the glaze is still warm and at its most vibrant.
Pro Tips For Making Honey Balsamic Chicken
- Pound the Chicken: I learned this the hard way—uneven chicken breasts cook unevenly. Pound them to an even ½-inch thickness so they cook through without drying out.
- Reduce the Sauce: After simmering the honey, balsamic, and soy sauce, let it reduce for 3-4 minutes until it thickens slightly. This makes a real difference in getting that glossy, clingy glaze.
- Skip Raw Garlic: Sounds weird, but it works: sauté the minced garlic for 30 seconds before adding liquids to mellow its bite and prevent a harsh aftertaste in the finished dish.
- Rest Before Serving: Give the chicken a solid 5 minutes off the heat before slicing—yes, even if you’re impatient like me. It keeps the juices inside where they belong.
Dietary Considerations for This Recipe
Gluten-Free Option
To make this dish gluten-free, simply swap the soy sauce for tamari at a 1:1 ratio. Tamari is a gluten-free soy sauce alternative that delivers the same umami depth. I always keep a bottle of San-J Tamari in my pantry for such swaps. 💡
Lower Sugar Alternative
For a lower sugar version, reduce the honey to ¼ cup and add 1 tbsp of sugar-free maple syrup. This maintains the sweetness while cutting sugar content by about 30%. The glaze will still caramelize beautifully.
Dairy-Free and Nut-Free
This recipe is naturally dairy-free and nut-free, making it safe for most allergies. Just double-check your chicken broth and soy sauce labels for hidden dairy or nut derivatives. I recommend Imagine Foods broth for guaranteed allergy-friendly cooking.
Low-Sodium Adjustments
To reduce sodium, use low-sodium soy sauce and low-sodium chicken broth. You can also cut the added salt by ½ tsp since the soy sauce already contributes saltiness. Taste the glaze before coating the chicken and adjust as needed.
High-Protein Boost
For extra protein, serve this dish with a side of quinoa or farro. These grains add about 8g of protein per ½ cup cooked. I often pair it with roasted Brussels sprouts for a balanced, protein-packed meal.
Keto-Friendly Version
To make this keto-friendly, replace the honey with ¼ cup of a keto sweetener like allulose or monk fruit. Use chicken thighs instead of breasts for higher fat content. Serve with roasted zucchini or cauliflower rice. 🥗
Nutrition Facts
Frequently Asked Questions
What’s the best pan for cooking this dish?
A heavy-bottomed stainless steel or cast iron skillet works best. These distribute heat evenly and develop a good sear on the chicken. Avoid nonstick pans as they won’t caramelize the glaze as effectively.
Can I use chicken thighs instead of breasts?
Yes, bone-in or boneless thighs work well and often stay juicier. Increase cooking time to 6-7 minutes per side for bone-in, or until they reach 175°F internally. The glaze pairs beautifully with the richer flavor.
How can I prevent the glaze from burning?
Keep heat at medium when reducing the glaze and stir frequently. If it starts to darken too quickly, remove the pan from heat briefly. Adding the cornstarch slurry helps stabilize the mixture.

- Jollof Rice Sauce Recipe: West African Tomato and Spice Infusion - September 25, 2026
- Japanese Rice Soup Recipe: Umami-Rich Comfort in a Bowl - September 25, 2026
- Homemade Cream Of Rice Recipe: Silk-Smooth Breakfast in Minutes - September 25, 2026