
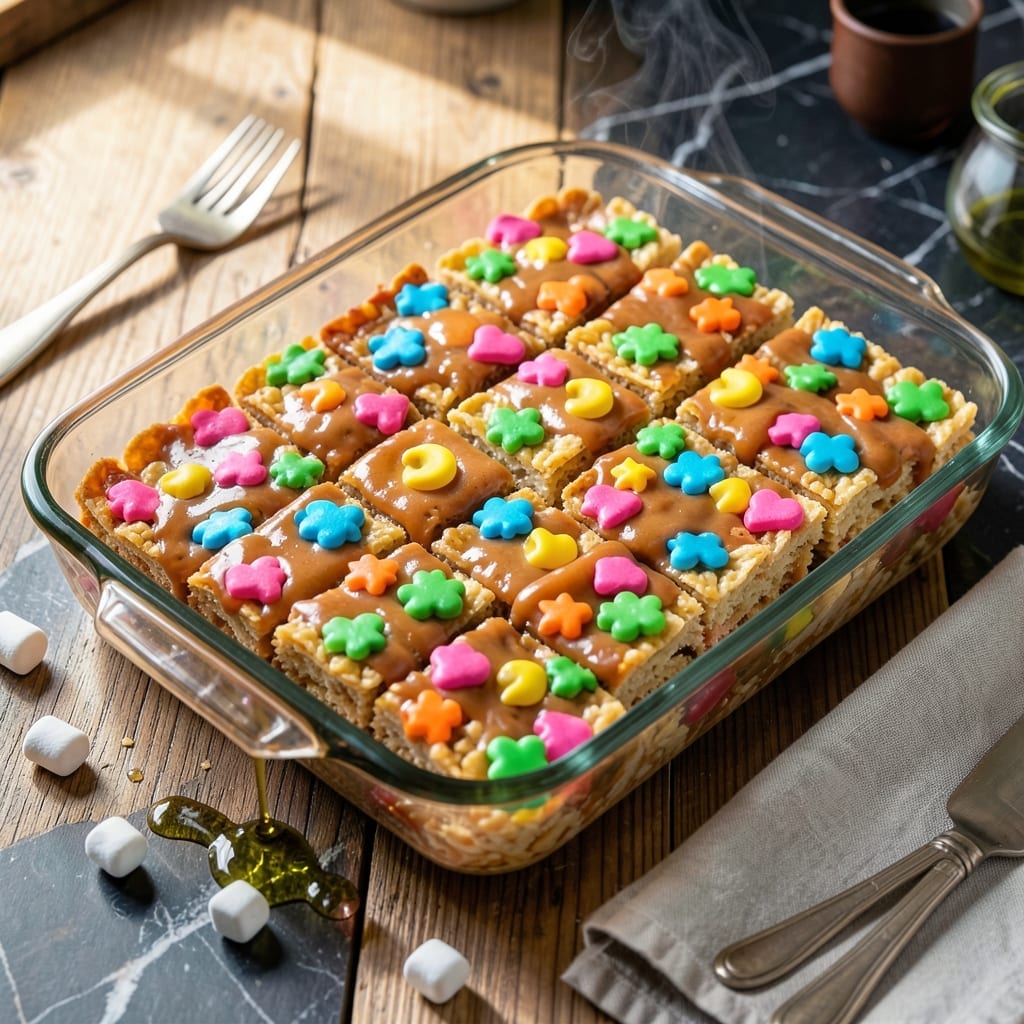
These treats bring a playful twist to classic rice crispy bars with colorful cereal and marshmallow magic. The combination of crispy rice cereal and Lucky Charms creates a fun, crunchy texture that kids and adults alike will love.
With just a few simple ingredients and 15 minutes of prep, you’ll have a batch of these vibrant, crispy bars ready to enjoy. Perfect for parties, lunchboxes, or a sweet afternoon snack.
Ingredients for Lucky Charms Rice Crispy
Colorful cereal plus marshmallows make these no-bake bars irresistibly fun for all ages.
| Ingredient | Amount | Notes |
|---|---|---|
| Lucky Charms Cereal 🍲 | 4 cups | Marshmallows included for color |
| Rice Krispies Cereal 🥣 | 3 cups | Standard variety preferred |
| Mini Marshmallows 🍬 | 10 oz | Fresh for best melt |
| Unsalted Butter 🧈 | ½ cup | 1 stick, for binding |
| Vanilla Extract 🌿 | 1 tsp | Pure extract recommended |
| Salt 🧂 | ¼ tsp | Balances sweetness |
| Cooking Spray 🧴 | 1 can | For greasing pan |
The cereal is the star here. Lucky Charms with marshmallows gives you that signature pop of color and texture, but generic brands work too (just check for similar marshmallow content). Kellogg’s Rice Krispies are the gold standard for crispiness, but any puffed rice cereal does the trick. I grab mine from Target or Walmart—no specialty store needed for this one.
No mini marshmallows? Regular ones cut into quarters work in a pinch (just takes a minute longer to melt). Out of vanilla extract? Almond extract at half the amount gives a different but still delicious flavor. Want extra crunch? Add a handful of crushed pretzels or chopped nuts. The butter can be salted if that’s what you’ve got—just skip the added salt.
These keep beautifully at room temp for 3-4 days in an airtight container. For longer storage, freeze for up to 2 months. Slice before freezing so you can grab individual portions straight from the freezer (they thaw in minutes).
Why You’ll Love This Recipe
- One Bowl Wonder: I melt the butter, dump in the cereals and marshmallows, and it’s done—no fancy tools, no mess.
- Marshmallow Magic: The vanilla and melted mini marshmallows coat every piece of Rice Krispies and Lucky Charms in gooey, sweet perfection.
- Party or Snack: I’ve made this for birthday parties and mid-afternoon cravings—equally welcome both times.
- Stays Fresh: Honestly, these keep for days in an airtight container, so I can make a batch Sunday and still enjoy it Wednesday.
Step-by-Step Instructions for Magical Marshmallow Crunch Bars
Here’s how to make these colorful, crispy treats with the perfect marshmallow hold.
Step 1: Prepare the Pan and Melt the Butter
First, lightly coat a 9×13-inch baking pan with the cooking spray. This ensures the bars won’t stick and makes for easy cutting later. I always double-check the corners and edges—they’re the most likely spots to cause trouble.
In a large pot, melt the 0.5 cup unsalted butter over low heat. Watch closely and stir occasionally until it’s fully liquid but not browned. You want smooth, golden melted butter, not a burnt mess. This is your base for the marshmallow mixture, so take your time.
Step 2: Melt the Marshmallows into a Smooth Sauce
Once the butter is melted, add the 10 oz mini marshmallows all at once. Stir constantly with a silicone spatula or wooden spoon until they melt completely. This usually takes 3-5 minutes over low heat.
The mixture will start out lumpy, but keep stirring—it’ll transform into a glossy, stretchy sauce. Remove it from the heat the moment the last marshmallow disappears. If you leave it on too long, the mixture will thicken too much and make the bars dense instead of light and crispy.
Step 3: Flavor the Marshmallow Mixture
Immediately stir in the 1 tsp vanilla extract and 0.25 tsp salt. The vanilla adds depth and warmth, while the salt balances the sweetness. Mix for 10-15 seconds until both are fully incorporated.
This step seems small, but it makes a big difference. The salt enhances all the flavors, and the vanilla gives that classic marshmallow treat aroma. Don’t skip it—I promise you’ll taste the difference.
Step 4: Combine the Cereals for Maximum Crunch
In a large bowl, combine the 4 cups Lucky Charms Cereal and 3 cups Rice Krispies Cereal. I like to break up any large clusters of Lucky Charms so every bite has a mix of textures and colors.
Pour the marshmallow mixture over the cereal and fold everything together gently with a spatula. You want to coat every piece evenly, but don’t press down too hard—this keeps the bars light and airy. The mixture will look sticky and vibrant, with the marshmallows clinging to each cereal piece.
Step 5: Press and Set for Perfect Texture
Transfer the mixture to your prepared pan. Using the spatula or your hands (lightly greased with more cooking spray), press it down evenly. Don’t compact it too tightly—just enough so the bars hold together when sliced.
Let the bars set at room temperature for 1-2 hours until firm. You’ll know they’re ready when the top is no longer sticky to the touch and the edges pull away slightly from the pan. Then, slice into squares and enjoy the magical crunch in every bite.
Pro Tips For Making Lucky Charms Rice Crispy
- Melt Butter Low: Use medium-low heat when melting the butter with marshmallows—I learned this the hard way after scorching two batches. It keeps the sugar from burning and the mixture smooth.
- Crush the Charms: Lightly crush the Lucky Charms before mixing so the marshmallows bind better to the cereal pieces. Sounds weird, but it works and prevents a crumbly mess.
- Skip the Overmixing: Stir just until the cereal is coated, then stop. Overmixing turns the Rice Krispies soggy and the Lucky Charms into a mushy, colorful blob.
- Press While Warm: Press the mixture into the pan while it’s still warm and sticky—waiting even 2 minutes makes it harder to shape. A buttered spatula or your hands (lightly greased) works best.
Perfect Pairings for This Recipe
Party Platter Pairings
These colorful bars shine on a dessert table with other easy treats. I love serving them alongside chocolate-dipped pretzels for a sweet-salty contrast. Add a bowl of rainbow sprinkles for guests to roll the edges of their bars for extra fun. 💫
Drink Combinations
Cold milk is the classic pairing—it enhances the marshmallow flavor and cleanses the palate. For adults, try a glass of vanilla chai tea or cold brew coffee to balance the sweetness without overpowering the cereal crunch.
Ice Cream Toppings
Crumbled bars make an incredible topping for vanilla ice cream. The cereal stays crispy even when spooned over cold desserts. I sprinkle about ½ cup crumbles per serving for perfect texture in every bite.
Holiday Themes
For St. Patrick’s Day, press the mixture into a 9×13-inch pan and cut into shamrock shapes using a cookie cutter. At Christmas, add green and red M&Ms to the cereal mix before pressing for festive colors.
Lunchbox Additions
Pack individual bars with apple slices and cheese cubes for a balanced treat. The bars hold up well in lunchboxes for 3-4 days when wrapped in parchment paper to prevent sticking.
Dipping Sauces
Warm chocolate sauce or caramel dip takes these to the next level. I melt ½ cup chocolate chips with 2 tbsp heavy cream for a quick ganache that pairs perfectly with the cereal crunch. ✨
Nutrition Facts
Frequently Asked Questions
Can I use regular marshmallows instead of mini?
Yes, but cut them into quarters first for even melting. Regular marshmallows take 1-2 minutes longer to melt completely over low heat. Stir constantly to prevent burning.
How do I keep the bars from getting hard?
Don’t overmix the cereal with the marshmallow sauce. Press lightly when shaping, and store in an airtight container with parchment between layers. They stay fresh for 3-4 days.
Can I add chocolate chips to the mix?
Fold in ½ cup chocolate chips after combining the cereal and marshmallow mixture. Let the bars cool completely before slicing to prevent melting.
Why did my bars turn out too sticky?
They likely needed more setting time. Let them sit at room temperature for the full 1-2 hours before cutting. If still sticky, refrigerate for 20 minutes to firm up.

- Peri Peri Rice Recipe: Spicy Portuguese One-Pot Harmony - November 6, 2026
- Mexican Flavoured Rice Recipe: Authentic Spice-Infused One-Pot Meal - November 6, 2026
- Lao Gan Ma Fried Rice Recipe: Spicy Wok-Tossed Perfection - November 6, 2026