
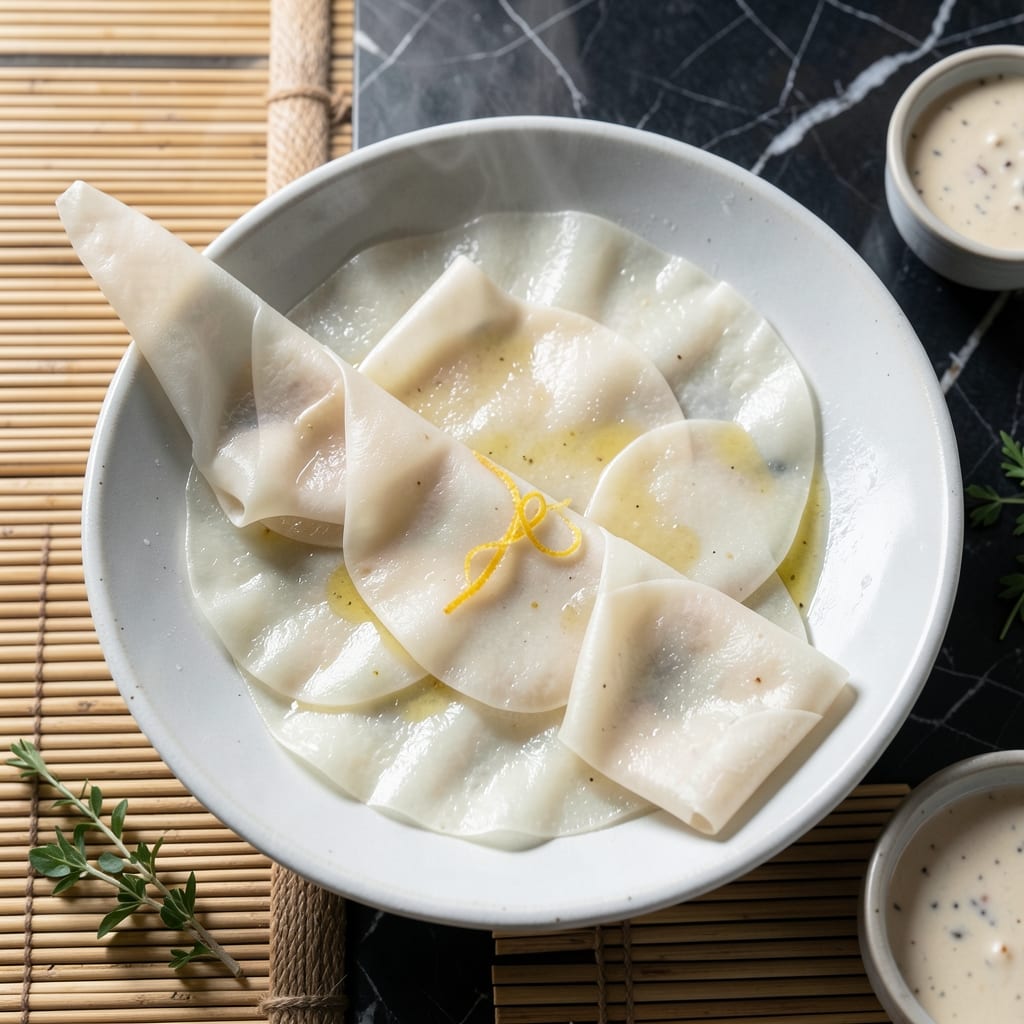
Making fresh rice wrappers at home transforms your spring rolls from good to extraordinary. This technique yields delicate, translucent sheets that rival anything store-bought.
The process combines simple ingredients—rice flour, water, and a pinch of salt—mixed into a thin batter. Steaming creates flexible skins that hold fillings perfectly without tearing.
You’ll achieve restaurant-quality texture with just a few minutes of hands-on time. The wrappers dry smooth and pliable, ready for any filling you choose.
This method ensures consistent results every time, making it ideal for meal prep or last-minute appetizers.
Ingredients for Rice Wrapper
Minimal ingredients yield restaurant-quality rice wrappers with translucent, flexible texture.
| Ingredient | Amount | Notes |
|---|---|---|
| Rice Flour 🌾 | 2 cups | White rice flour preferred |
| Water 💧 | 2 ½ cups | Warm tap water works |
| Salt 🧂 | ½ tsp | Fine sea salt preferred |
| Tapioca Starch 🌾 | 2 tbsp | For elasticity and chew |
| Neutral Oil 🫒 | 1 tsp | For greasing steam surface |
| Cornstarch 🌽 | 1 tbsp | Prevents sticking during drying |
| Lemon Juice 🍋 | 1 tsp | Optional for brightness |
Rice flour quality matters here. Bob’s Red Mill or Anthony’s Goods white rice flour yield the most delicate texture. Avoid sweet rice flour—it creates a denser wrapper. Tapioca starch (found in the baking aisle at Whole Foods or Natural Grocers) adds the necessary chew that makes these wrappers hold up to hearty fillings without tearing.
No tapioca starch? Arrowroot powder at a one-to-one ratio works equally well. For a slight flavor boost, a pinch of turmeric adds color without affecting texture. The water temperature should be warm to the touch (about 110°F), not hot—this helps the batter spread evenly. If your batter seems too thick, thin it gradually with additional warm water.
Fresh wrappers keep in an airtight container at room temperature for 2-3 days. For longer storage, freeze between parchment paper for up to 1 month. Thaw at room temperature before using. Dusting with cornstarch prevents sticking during storage and drying.
Why You’ll Love This Recipe
- Mix and Rest: I just stir rice flour, tapioca starch, water, and a pinch of salt—no kneading, no fuss. Honestly, the hardest part is waiting 30 minutes for the batter to rest.
- Crispy Chewy Magic: That combo of rice flour and tapioca starch gives them the best texture—slightly crisp at the edges with a chewy bite. Neutral oil keeps the flavor clean so the wrappers shine.
- Endless Fillings: I’ve stuffed these with everything from lemongrass chicken to tofu and herbs. They’re just as good fresh or packed for lunch the next day.
- Pantry Staples Only: Five ingredients I always have on hand means no last-minute grocery runs. Between us, it’s cheaper than buying store-bought wrappers and tastes way better.
Step-by-Step Instructions for Rice Wrapper
Master the technique for homemade spring roll skins with this precise, professional method.
Step 1: Create the Batter
In a large mixing bowl, whisk together the 2 cups Rice Flour, 2 tbsp Tapioca Starch, 1 tbsp Cornstarch, and 0.5 tsp Salt until fully combined. The mixture should be uniform with no visible lumps or streaks of individual ingredients.
Gradually pour in the 2.5 cups Water while continuing to whisk vigorously. The batter should reach the consistency of heavy cream—smooth, fluid, and free of clumps. This homogeneous mixture ensures even cooking and the right texture for your wrappers.
Step 2: Rest the Batter for Optimal Texture
Cover the bowl with a clean kitchen towel or plastic wrap and let the batter rest at room temperature for 30 minutes. This resting period allows the starches to fully hydrate and the gluten to relax, which is critical for achieving the right elasticity and chew in your finished wrappers.
After resting, give the batter a quick stir. You may notice it has thickened slightly—this is normal. If the surface has developed a thin skin, simply stir it back into the mixture. The batter is now ready for cooking.
Step 3: Cook the Wrappers on a Steaming Surface
Heat a non-stick skillet or crepe pan over medium heat and lightly grease the surface with the 1 tsp Neutral Oil using a paper towel. The pan is ready when a drop of water sizzles and evaporates immediately upon contact.
Pour a thin layer of batter onto the pan, swirling it immediately to create an even, paper-thin circle. Cook undisturbed for 1-2 minutes until the edges begin to lift and the surface appears set with no visible wet spots. The wrapper should look translucent with a slightly matte finish.
Step 4: Finish and Prepare for Storage
Carefully lift the cooked wrapper from the pan using a thin spatula and transfer it to a clean kitchen towel or parchment paper. If using, lightly brush the surface with the 1 tsp Lemon Juice for a subtle brightness that complements the neutral flavor of the rice flour.
Allow each wrapper to cool completely before stacking. Dusting each layer with a bit of additional rice flour can prevent sticking during storage. Once cooled, the wrappers are ready to use immediately or can be stored in an airtight container in the refrigerator for up to 3 days.
Pro Tips For Making Rice Wrapper
- Heat the Pan First: I learned this the hard way—crank your non-stick pan to medium-high before pouring the batter, or the wrappers will stick and tear. A drop of water should sizzle and dance when it’s ready.
- Whisk Until Smooth: Lumps in your rice flour and tapioca starch batter mean uneven wrappers. Whisk vigorously for at least 2 minutes, then let it rest 10 minutes—it’ll pour like silk.
- Skip the Thick Batter: Resist the urge to make it thicker for “easier handling.” It should be the consistency of heavy cream, or your wrappers will turn out gummy instead of delicate.
- Oil Lightly, Often: Use a paper towel to swipe about ½ teaspoon of neutral oil across the pan between each wrapper. Sounds tedious, but it’s the only way to guarantee they release cleanly every time.
Regional Styles of These Flavors
Vietnamese Tradition
In Vietnam, these wrappers are called bánh tráng and are made from rice flour, water, and sometimes mung bean starch for extra elasticity. The batter is spread thin on bamboo mats and steamed, creating the delicate sheets used for gỏi cuốn (fresh spring rolls). 🗺️
Thai Adaptation
Thai versions often incorporate a touch of turmeric for a golden hue and subtle earthy flavor. They’re slightly thicker than Vietnamese wrappers, making them ideal for heartier fillings like Thai basil and peanuts. I love using King Arthur Rice Flour for this style.
Cambodian Approach
Cambodian rice wrappers, or num kachay, often include coconut milk in the batter for a richer taste. The addition of 1-2 tbsp coconut milk creates a slightly sweeter, more fragrant wrapper that pairs beautifully with lemongrass and mint fillings.
Chinese Rice Paper
In Chinese cuisine, these wrappers are often larger and used for dishes like spring roll skins. They’re typically made with a higher ratio of tapioca starch for a chewier texture. I’ve found Shirataki rice paper brands at Asian markets work well for this style.
Filipino Lumpia
Filipino lumpia wrappers are sometimes made with a mix of rice flour and wheat flour for added durability. The batter is often seasoned with annatto for a vibrant orange color, perfect for frying into crispy lumpia shanghai. ✨
Nutrition Facts
Frequently Asked Questions
What kind of pan works best for cooking these?
A non-stick skillet or crepe pan is ideal for even cooking. Avoid cast iron as it can cause sticking. Ensure the pan is well-heated before adding batter for best results.
Can I make these without tapioca starch?
Yes, substitute with arrowroot powder at a 1:1 ratio. This maintains the chewy texture. Without it, wrappers may become brittle when dry.
Why did my wrappers tear when rolling?
They may have been too thin or not fully cooked. Aim for paper-thin consistency and cook until edges lift (1-2 minutes). Resting the batter helps too.
How do I store leftover wrappers?
Stack cooled wrappers with parchment between each. Store in an airtight container at room temperature for 2-3 days or freeze for 1 month.

- Rice Pudding Recipe With Eggs and Milk: Old-Fashioned Custard-Style Comfort - September 30, 2026
- Rice Noodle Sauce Recipe: Bold Umami Depth for Authentic Stir-Fry - September 30, 2026
- Rice Pilaf Recipe: Fragrant Basmati With Toasted Vermicelli - September 30, 2026