
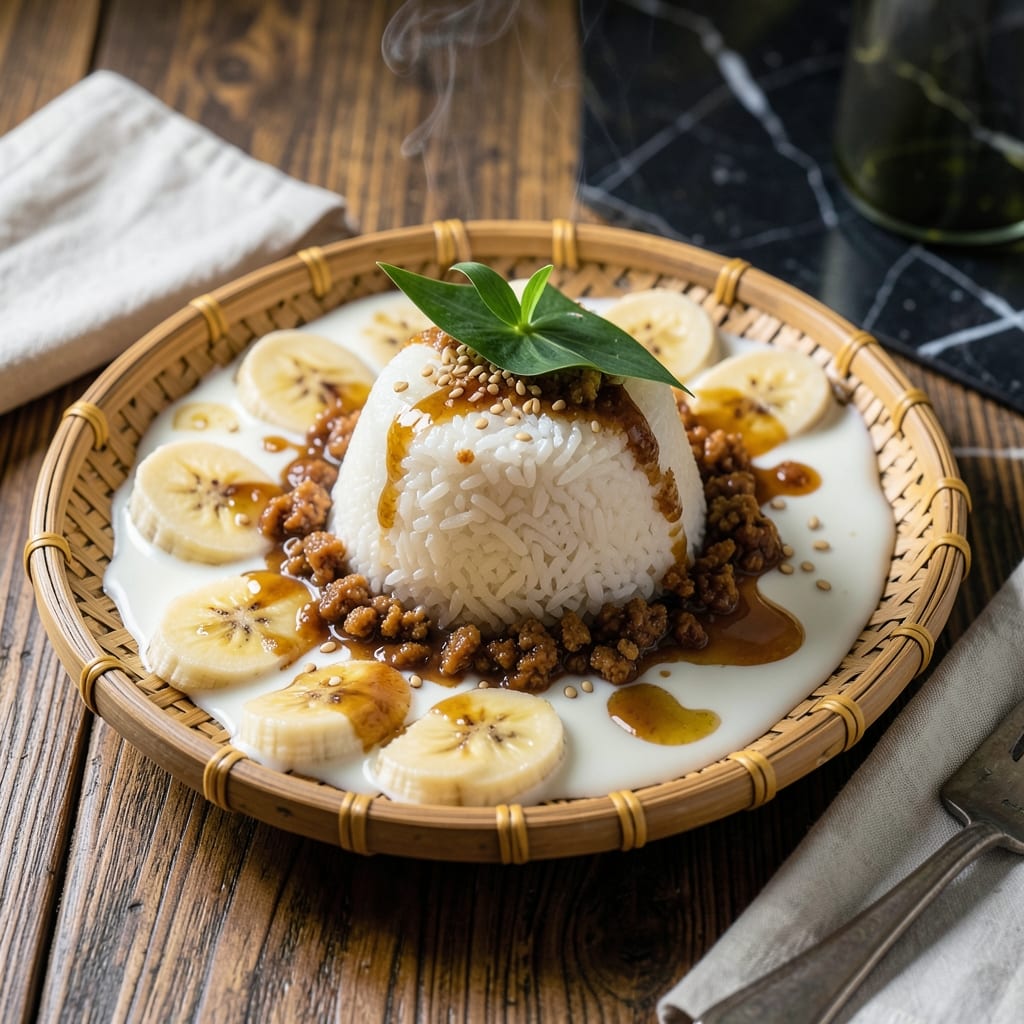
This traditional Filipino dessert combines glutinous rice with rich coconut milk for a texture that’s uniquely chewy and satisfying. I developed this recipe after studying authentic methods from rural kitchens where kakanin has been perfected over generations.
The secret lies in the proper rice-to-liquid ratio and steady steaming. What emerges is a treat with a slightly sticky surface, tender interior, and the distinct aroma of toasted coconut that defines this beloved sweet.
Ingredients for Glutinous Rice Kakanin
Sweet rice, coconut milk, and a touch of sugar create this beloved Filipino treat.
| Ingredient | Amount | Notes |
|---|---|---|
| Glutinous Rice 🍚 | 2 cups | Sweet rice, soaked overnight |
| Coconut Milk 🥥 | 2 cups | Full-fat, canned preferred |
| Brown Sugar 🧈 | 1 cup | Packed, for sweetness |
| Water 💧 | 1 ½ cups | For soaking and cooking |
| Salt 🧂 | ½ tsp | Balances sweetness |
| Vanilla Extract 🌿 | 1 tsp | Pure, for depth of flavor |
| Shredded Coconut 🥥 | ½ cup | Unsweetened, toasted for garnish |
| Pandan Leaves 🌿 | 2 whole | Optional, for aroma |
| Coconut Oil 🫒 | 1 tbsp | For greasing steamer |
| Banana Leaves 🍃 | 2 pieces | Optional, for lining |
The glutinous rice is non-negotiable here—look for sweet rice or sticky rice labels at Asian markets (the good stuff, not regular white rice). Coconut milk should be full-fat for that luxurious texture; Thai Kitchen or Chaokoh brands are reliable. Soaking the rice overnight ensures even cooking and that signature chewy bite. Pandan leaves add authentic aroma but can be skipped if unavailable.
No brown sugar? Coconut sugar or palm sugar works beautifully and deepens the flavor. Swap the shredded coconut for freshly grated coconut meat if you can find it. Vanilla extract can be replaced with pandan extract for a more traditional taste. For a quicker version, pre-cooked glutinous rice (sold in pouches) cuts the soaking step entirely.
Store cooked kakanin in an airtight container at room temperature for 2-3 days or refrigerate for up to 1 week. Reheat by steaming for 5-10 minutes to restore that fresh, sticky texture. The toasted coconut garnish is best added just before serving to keep it crisp.
Why You’ll Love This Recipe
- One Pot Wonder: I just dump the glutinous rice, coconut milk, and brown sugar in a pot and let it simmer—no fancy steps.
- Rich Coconut Goodness: That creamy coconut milk soaks into the rice, giving it this melt-in-your-mouth sweetness.
- Feeds a Crowd: I make a big batch and it disappears fast at potlucks or family gatherings.
- Budget Stretch: A pound of glutinous rice and a can of coconut milk go a long way without breaking the bank.
Step-by-Step Instructions for Glutinous Rice Kakanin
This traditional method ensures the perfect balance of chewy texture and rich coconut flavor.
Step 1: Soak and Prepare the Glutinous Rice
Begin by thoroughly rinsing the 2 cups Glutinous Rice under cold water until the water runs clear. This removes excess starch and prevents the final product from becoming gummy.
Transfer the rinsed glutinous rice to a large bowl and cover with the 1.5 cups Water. Add the 2 whole Pandan Leaves to infuse aroma during soaking. Allow it to soak for at least 4 hours, or ideally overnight. The rice grains should double in size and become slightly translucent when properly soaked.
Step 2: Steam the Rice to Perfect Tenderness
Drain the soaked glutinous rice, removing the pandan leaves. Line a steamer basket with the 2 pieces Banana Leaves or parchment paper if banana leaves are unavailable. Spread the rice evenly in the prepared steamer.
Bring water to a boil in the steamer base. Once steaming, place the basket over the boiling water, cover with a tight lid, and steam for 30-40 minutes until the rice is tender and slightly sticky. Check the water level periodically and replenish with hot water as needed to maintain steady steam.
Step 3: Prepare the Coconut Sugar Mixture
While the rice steams, combine the 2 cups Coconut Milk, 1 cup Brown Sugar, 0.5 tsp Salt, and 1 tsp Vanilla Extract in a saucepan. Place over medium heat and stir until the brown sugar fully dissolves and the mixture just begins to simmer.
Remove from heat immediately to prevent curdling. The mixture should be smooth and fragrant with a glossy sheen. This coconut mixture will soak into the steamed rice, creating that signature rich, sweet flavor.
Step 4: Combine and Infuse the Flavors
Once the rice is steamed, transfer it to a large bowl. Gradually pour the warm coconut mixture over the hot rice, gently folding with a spatula to ensure even distribution. The rice should glisten with the coconut liquid.
Cover the bowl and let it sit for 15-20 minutes. This resting period allows the rice to absorb the coconut mixture fully, transforming it from separate components into a cohesive, flavorful kakanin.
Step 5: Toast and Garnish for Final Presentation
In a dry skillet over low heat, toast the 0.5 cup Shredded Coconut for 3-5 minutes until it turns golden brown and becomes fragrant. Keep a close eye as coconut can burn quickly.
Transfer the kakanin to a serving dish, drizzle with any remaining coconut mixture from the bowl, and sprinkle generously with the toasted shredded coconut. The contrast of the creamy kakanin with the crispy coconut topping creates the perfect textural finish.
Pro Tips For Making Glutinous Rice Kakanin
- Soak the Rice: Give your glutinous rice at least 4 hours in cold water—overnight if you can. I learned this the hard way when my first batch turned out unevenly cooked.
- Simmer Low and Slow: Keep the heat at a gentle simmer, not a boil, when cooking the rice in coconut milk. Any higher and the mixture will scorch or separate.
- Use Full-Fat Coconut Milk: Skip the light version—full-fat coconut milk makes a real difference in texture and richness. Sounds indulgent, but it’s non-negotiable for authentic flavor.
- Stir Occasionally: Resist the urge to walk away while the rice cooks. A quick stir every 5 minutes prevents sticking and guarantees even cooking.
Essential Equipment for Perfect Results
Steamer Basket
A bamboo steamer basket is essential for even heat distribution. I use a 10-inch diameter basket that fits perfectly over my wok. Look for one with a tight lid to trap steam effectively. Avoid metal steamers as they can create hot spots. 🌿
Banana Leaves
Authentic kakanin uses fresh banana leaves to line the steamer, adding subtle aroma. Find them frozen at Asian markets. Thaw, rinse, and briefly pass over an open flame to soften before use. Parchment paper works in a pinch.
Heavy Saucepan
For the coconut mixture, a heavy-bottomed saucepan prevents scorching. I prefer enamel-coated cast iron for even heating. Medium heat is key—too high and the coconut milk will separate. Stir constantly until sugar dissolves completely.
Wooden Spatula
A wide wooden spatula gently folds the coconut mixture into rice without crushing the grains. The flat surface helps distribute the liquid evenly. Avoid metal utensils that can scratch your cookware or compact the rice.
Dry Skillet
Toast the shredded coconut in a non-stick skillet over low heat. A 8-inch pan gives enough surface area for even browning. Watch carefully—coconut burns in seconds. Shake the pan frequently for consistent color.
Mixing Bowls
Use large stainless steel bowls for soaking rice and combining ingredients. The 4-quart size accommodates the rice as it expands. Glass bowls work too, but metal conducts heat better when combining warm coconut mixture with hot rice.
Nutrition Facts
Frequently Asked Questions
What can I use if I don’t have glutinous rice?
There’s no perfect substitute, but short-grain sushi rice can work in a pinch. The texture won’t be as chewy or sticky. Never use regular long-grain rice as it won’t absorb the coconut mixture properly.
Can I make this without a steamer?
Yes! Use a colander over a pot of boiling water with a tight lid. Alternatively, cook the rice in a rice cooker with the coconut mixture, though steaming gives the best texture.
Why did my kakanin turn out dry?
This usually happens when the rice is over-steamed or the coconut mixture wasn’t fully absorbed.
How do I know when the coconut mixture is ready? It should be glossy and just beginning to simmer with all sugar dissolved. Remove it from heat immediately to prevent the coconut milk from separating. Don’t let it boil vigorously.

- Glutinous Rice Flour Bread Recipe: Soft Pillows with Nutty Depth - October 12, 2026
- Green Rice Casserole Recipe: Cheesy Baked Comfort with Vibrant Herbs - October 12, 2026
- Glutinous Rice Coconut Milk Recipe: Chewy Sweetness With Tropical Depth - October 12, 2026