Teriyaki Chicken Recipe Oven: Sticky Glaze and Juicy Thighs

Teriyaki Chicken Recipe Oven: Sticky Glaze and Juicy Thighs

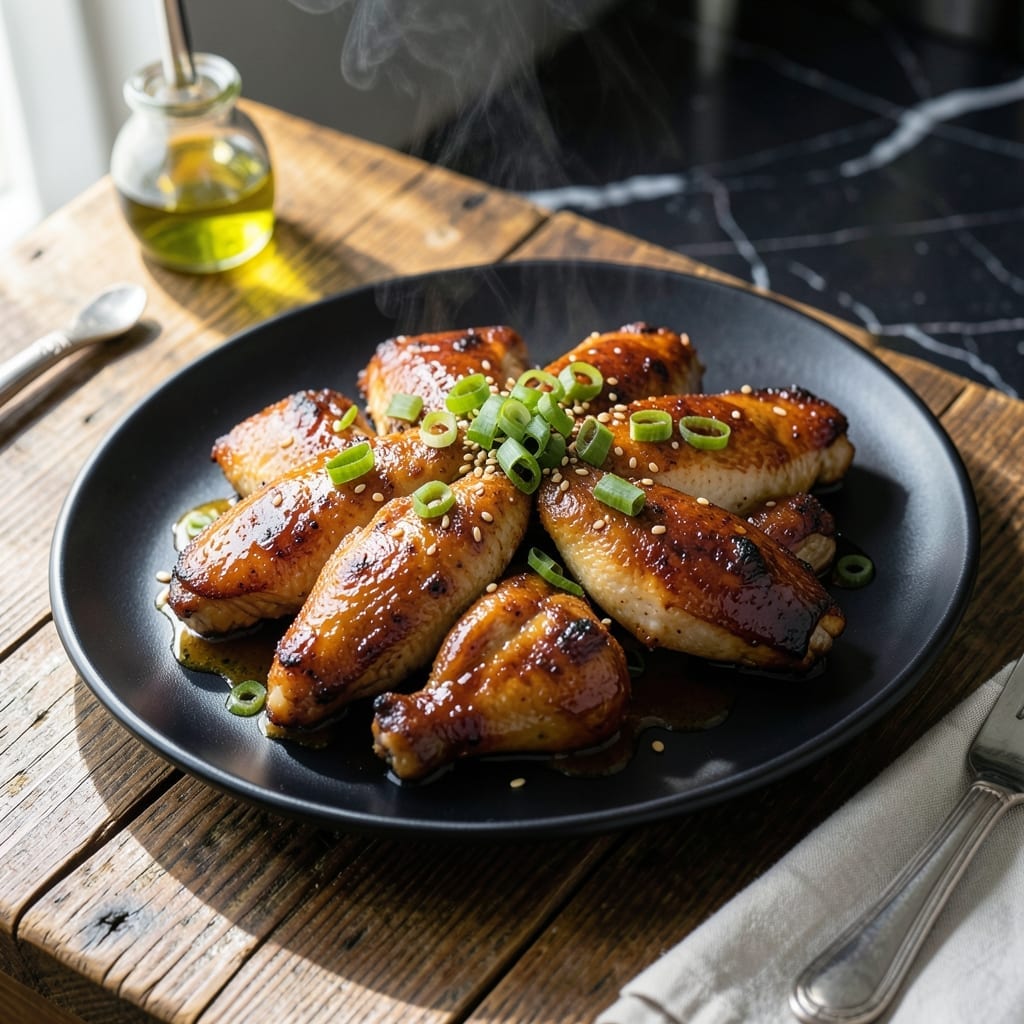
This oven-baked teriyaki chicken delivers juicy thighs coated in a glossy, sticky glaze without the fuss of stovetop cooking. The method ensures even caramelization while keeping the meat tender.

I’ve refined this technique to achieve restaurant-quality results at home. The oven’s dry heat concentrates the sauce’s flavors, creating a perfect balance of sweet and savory in every bite.

The key is marinating the chicken briefly before baking, allowing the teriyaki to penetrate deeply. A final broil step ensures that signature glossy, slightly charred finish.

Serve over rice with steamed vegetables for a complete meal that’s both satisfying and straightforward.

👨‍🍳
Difficulty
Medium
🍗
Diet
Poultry
⏱️
Total Time
30 min
🔥
Calories
Med Cal

Ingredients for Teriyaki Chicken Recipe Oven

Juicy thighs and glossy glaze start with these carefully selected ingredients for oven-baked perfection.

Ingredient Amount Notes
Boneless Skinless Chicken Thighs 🍗 2 lb Patted dry for even browning
Soy Sauce 🫙 ½ cup Low-sodium preferred for balance
Brown Sugar 🍚 ⅓ cup Light or dark works equally
Honey 🍯 ¼ cup Pure for best consistency
Fresh Ginger 🌿 1 tbsp Minced finely for even distribution
Garlic Cloves 🧄 4 cloves Minced for maximum flavor infusion
Rice Vinegar 🍶 2 tbsp Unseasoned for clean acidity
Sesame Oil 🫒 1 tsp Toasted for nutty depth
Cornstarch 🌾 1 tbsp For thickening the glaze
Water 💧 2 tbsp To dissolve cornstarch slurry
Vegetable Oil 🫒 1 tbsp Neutral flavor for greasing
Green Onions 🧅 3 whole Thinly sliced for garnish
Sesame Seeds 🌰 1 tbsp Toasted for garnish

The chicken quality is paramount for this dish. Boneless skinless thighs from a trusted butcher or Whole Foods ensure the juicy texture promised. Look for pieces with consistent thickness to guarantee even cooking. For the soy sauce, Kikkoman low-sodium provides the cleanest flavor without overpowering the glaze. The ginger and garlic should be freshly minced—no substitutes for these aromatic foundations.

Need a soy sauce alternative? Coconut aminos work in a pinch but adjust salt levels. Brown sugar can be swapped for maple syrup at equal volume, though it may darken faster. No fresh ginger? Ground ginger at one-sixth the amount is acceptable, but fresh delivers superior brightness. The rice vinegar can be replaced with apple cider vinegar if necessary, though the flavor profile will shift slightly.

Marinate the chicken up to 24 hours for deeper flavor penetration. The glaze keeps for 1 week refrigerated in an airtight container. Toast sesame seeds just before serving to preserve their crisp texture. Leftovers reheat well within 3 days—broil briefly to restore the sticky finish.

❤️

Why You’ll Love This Recipe

  • One Pan Wonder: I toss the chicken thighs with the soy-honey glaze, pop it in the oven, and let it do the work—no babysitting, no flipping.
  • Sticky Sweet Bite: The brown sugar and honey caramelize into this glossy coating that clings to every piece. Honestly, I lick the pan after.
  • Feeds a Crowd: I make a double batch on Sunday and we’ve got lunches covered for days—still tastes amazing cold in a wrap.

Step-by-Step Instructions for Teriyaki Chicken Oven

Here’s the method. Straightforward, tested, works every time.

Step 1: Prepare the Chicken and Preheat Oven

Pat the 2 lb boneless skinless chicken thighs completely dry with paper towels to ensure even browning. Trim any excess fat and season lightly with salt and pepper. This step prevents steaming and promotes caramelization.

Preheat your oven to 400°F. While the oven heats, arrange the chicken in a single layer on a rimmed baking sheet lined with parchment paper. Brush both sides lightly with the 1 tbsp vegetable oil to prevent sticking and promote browning.

Step 2: Create the Teriyaki Glaze

In a medium saucepan, combine the 0.5 cup soy sauce, 0.33 cup brown sugar, 0.25 cup honey, minced 1 tbsp fresh ginger, minced 4 cloves garlic cloves, and 2 tbsp rice vinegar. Bring to a simmer over medium heat, stirring until the sugar dissolves.

In a small bowl, whisk together the 1 tbsp cornstarch and 2 tbsp water to create a slurry. Slowly pour this into the simmering sauce while whisking constantly. Cook for 1-2 minutes until the glaze thickens to coat the back of a spoon, then remove from heat and stir in the 1 tsp sesame oil.

Step 3: Bake and Glaze the Chicken

Bake the chicken for 20 minutes at 400°F. After this initial baking period, brush a generous layer of the teriyaki glaze over each piece, reserving about half for later. Return to the oven and bake for another 10-12 minutes until the internal temperature reaches 175°F.

The chicken should be glossy and slightly caramelized at the edges. If the glaze begins to darken too quickly, tent the pan loosely with foil to prevent burning while ensuring the chicken cooks through completely.

Step 4: Broil for Final Caramelization

Switch the oven to broil on high. Brush the remaining teriyaki glaze over the chicken and broil for 2-3 minutes, watching closely to prevent burning. The glaze should bubble and become deeply caramelized, creating that signature sticky texture.

Remove from the oven when the chicken is deeply browned and the glaze has thickened into a glossy coating. The thighs should be tender and juicy, with the glaze adhering perfectly to the surface.

Step 5: Garnish and Serve

Transfer the chicken to a serving platter and let rest for 5 minutes. This allows the juices to redistribute, ensuring each bite is moist and flavorful. Thinly slice the 3 whole green onions and sprinkle over the chicken along with the 1 tbsp sesame seeds.

Serve immediately while the glaze is still warm and sticky. The combination of sweet, salty, and umami flavors should be perfectly balanced, with the chicken remaining juicy and tender throughout.

👨‍🍳

Pro Tips For Making Teriyaki Chicken Recipe Oven

  • Bake at 400°F: I learned this the hard way—any lower and the sauce won’t caramelize properly, leaving you with pale, watery teriyaki instead of that glossy, sticky finish. Crank it up and flip the thighs halfway for even browning.
  • Trim Excess Fat: Sounds tedious, but it’s worth it: trimming the visible fat off the thighs keeps the sauce from turning greasy and helps it cling better to the meat.
  • Skip the Overcrowding: After my first attempt came out steamed instead of roasted, I now leave at least an inch between each thigh so the heat can circulate and crisp up the edges.
  • Simmer the Sauce: Reduce the teriyaki mixture on the stovetop for 3-4 minutes before slathering it on—this thickens it just enough to coat the chicken without sliding right off in the oven.

Make-Ahead Tips for Leftovers

Marinate Ahead

Combine the teriyaki glaze ingredients up to 24 hours before cooking. I mix the soy sauce, brown sugar, and aromatics, then store in an airtight container in the fridge. This not only saves time but also deepens the flavor complexity. 💡

Prep the Chicken

Pat the chicken thighs dry and trim any excess fat the night before. Store them in a sealed container with ¼ of the teriyaki glaze for marinating. This ensures even flavor distribution and reduces day-of prep time.

Glaze Storage

The prepared teriyaki glaze keeps for up to 1 week in the refrigerator. I often make a double batch, using half for the recipe and saving the rest for future meals. Just reheat gently before using.

Baking Sheet Prep

Line your baking sheet with parchment paper and grease it lightly with vegetable oil up to 12 hours ahead. Cover with foil to keep it dust-free. This small step makes the cooking process smoother on busy days.

Garnish Ready

Slice the green onions and toast the sesame seeds up to 2 days in advance. Store them separately in the fridge and at room temperature, respectively. This ensures fresh, crisp garnishes when serving. ✨

Reheating Leftovers

Store cooked chicken in an airtight container for up to 3 days. To revive, place on a baking sheet, brush with a little extra glaze, and broil for 2-3 minutes to restore the sticky finish.

Nutrition Facts

Servings 4
Amount Per Serving
Calories 480kcal
% Daily Value
Total Fat 18g23%
Saturated Fat 4g20%
Cholesterol 145mg48%
Sodium 1200mg52%
Total Carbohydrate 42g15%
Dietary Fiber 1g4%
Sugars 38g
Protein 34g68%
Percent Daily Values are based on a 2,000 calorie diet. Your daily values may be higher or lower depending on your calorie needs.

Frequently Asked Questions

1

What temperature should the oven be set to?

Bake at 400°F for the first 20 minutes, then finish under the broiler. This ensures even cooking while achieving that signature caramelized glaze.

2

Can I use chicken breasts instead of thighs?

You can, but reduce baking time by 5-7 minutes as breasts cook faster. Thighs stay juicier and are more forgiving, though. Keep an eye on internal temp to avoid dryness.

3

How do I prevent the glaze from burning?

If it darkens too quickly, tent the pan with foil. The final 2-3 minute broil should be watched closely. Always reserve some glaze for a fresh top coat.

4

Can I make this ahead for meal prep?

Store cooked chicken in an airtight container for up to 3 days. Reheat by broiling briefly to restore the sticky finish.

★★★★★4.9(11 reviews)
Tyler Campbell

Teriyaki Chicken Recipe Oven: Sticky Glaze and Juicy Thighs

Teriyaki Chicken Recipe Oven: Sticky Glaze and Juicy Thighs

This oven-baked teriyaki chicken delivers juicy thighs coated in a glossy, sticky glaze without the fuss of stovetop cooking. The method ensures even caramelization while keeping the meat tender.

I’ve refined this technique to achieve restaurant-quality results at home. The oven’s dry heat concentrates the sauce’s flavors, creating a perfect balance of sweet and savory in every bite.

The key is marinating the chicken briefly before baking, allowing the teriyaki to penetrate deeply. A final broil step ensures that signature glossy, slightly charred finish.

Serve over rice with steamed vegetables for a complete meal that’s both satisfying and straightforward.

👨‍🍳
Difficulty
Medium
🍗
Diet
Poultry
⏱️
Total Time
30 min
🔥
Calories
Med Cal

Ingredients for Teriyaki Chicken Recipe Oven

Juicy thighs and glossy glaze start with these carefully selected ingredients for oven-baked perfection.

Ingredient Amount Notes
Boneless Skinless Chicken Thighs 🍗 2 lb Patted dry for even browning
Soy Sauce 🫙 ½ cup Low-sodium preferred for balance
Brown Sugar 🍚 ⅓ cup Light or dark works equally
Honey 🍯 ¼ cup Pure for best consistency
Fresh Ginger 🌿 1 tbsp Minced finely for even distribution
Garlic Cloves 🧄 4 cloves Minced for maximum flavor infusion
Rice Vinegar 🍶 2 tbsp Unseasoned for clean acidity
Sesame Oil 🫒 1 tsp Toasted for nutty depth
Cornstarch 🌾 1 tbsp For thickening the glaze
Water 💧 2 tbsp To dissolve cornstarch slurry
Vegetable Oil 🫒 1 tbsp Neutral flavor for greasing
Green Onions 🧅 3 whole Thinly sliced for garnish
Sesame Seeds 🌰 1 tbsp Toasted for garnish

The chicken quality is paramount for this dish. Boneless skinless thighs from a trusted butcher or Whole Foods ensure the juicy texture promised. Look for pieces with consistent thickness to guarantee even cooking. For the soy sauce, Kikkoman low-sodium provides the cleanest flavor without overpowering the glaze. The ginger and garlic should be freshly minced—no substitutes for these aromatic foundations.

Need a soy sauce alternative? Coconut aminos work in a pinch but adjust salt levels. Brown sugar can be swapped for maple syrup at equal volume, though it may darken faster. No fresh ginger? Ground ginger at one-sixth the amount is acceptable, but fresh delivers superior brightness. The rice vinegar can be replaced with apple cider vinegar if necessary, though the flavor profile will shift slightly.

Marinate the chicken up to 24 hours for deeper flavor penetration. The glaze keeps for 1 week refrigerated in an airtight container. Toast sesame seeds just before serving to preserve their crisp texture. Leftovers reheat well within 3 days—broil briefly to restore the sticky finish.

❤️

Why You’ll Love This Recipe

  • One Pan Wonder: I toss the chicken thighs with the soy-honey glaze, pop it in the oven, and let it do the work—no babysitting, no flipping.
  • Sticky Sweet Bite: The brown sugar and honey caramelize into this glossy coating that clings to every piece. Honestly, I lick the pan after.
  • Feeds a Crowd: I make a double batch on Sunday and we’ve got lunches covered for days—still tastes amazing cold in a wrap.

Step-by-Step Instructions for Teriyaki Chicken Oven

Here’s the method. Straightforward, tested, works every time.

Step 1: Prepare the Chicken and Preheat Oven

Pat the 2 lb boneless skinless chicken thighs completely dry with paper towels to ensure even browning. Trim any excess fat and season lightly with salt and pepper. This step prevents steaming and promotes caramelization.

Preheat your oven to 400°F. While the oven heats, arrange the chicken in a single layer on a rimmed baking sheet lined with parchment paper. Brush both sides lightly with the 1 tbsp vegetable oil to prevent sticking and promote browning.

Step 2: Create the Teriyaki Glaze

In a medium saucepan, combine the 0.5 cup soy sauce, 0.33 cup brown sugar, 0.25 cup honey, minced 1 tbsp fresh ginger, minced 4 cloves garlic cloves, and 2 tbsp rice vinegar. Bring to a simmer over medium heat, stirring until the sugar dissolves.

In a small bowl, whisk together the 1 tbsp cornstarch and 2 tbsp water to create a slurry. Slowly pour this into the simmering sauce while whisking constantly. Cook for 1-2 minutes until the glaze thickens to coat the back of a spoon, then remove from heat and stir in the 1 tsp sesame oil.

Step 3: Bake and Glaze the Chicken

Bake the chicken for 20 minutes at 400°F. After this initial baking period, brush a generous layer of the teriyaki glaze over each piece, reserving about half for later. Return to the oven and bake for another 10-12 minutes until the internal temperature reaches 175°F.

The chicken should be glossy and slightly caramelized at the edges. If the glaze begins to darken too quickly, tent the pan loosely with foil to prevent burning while ensuring the chicken cooks through completely.

Step 4: Broil for Final Caramelization

Switch the oven to broil on high. Brush the remaining teriyaki glaze over the chicken and broil for 2-3 minutes, watching closely to prevent burning. The glaze should bubble and become deeply caramelized, creating that signature sticky texture.

Remove from the oven when the chicken is deeply browned and the glaze has thickened into a glossy coating. The thighs should be tender and juicy, with the glaze adhering perfectly to the surface.

Step 5: Garnish and Serve

Transfer the chicken to a serving platter and let rest for 5 minutes. This allows the juices to redistribute, ensuring each bite is moist and flavorful. Thinly slice the 3 whole green onions and sprinkle over the chicken along with the 1 tbsp sesame seeds.

Serve immediately while the glaze is still warm and sticky. The combination of sweet, salty, and umami flavors should be perfectly balanced, with the chicken remaining juicy and tender throughout.

👨‍🍳

Pro Tips For Making Teriyaki Chicken Recipe Oven

  • Bake at 400°F: I learned this the hard way—any lower and the sauce won’t caramelize properly, leaving you with pale, watery teriyaki instead of that glossy, sticky finish. Crank it up and flip the thighs halfway for even browning.
  • Trim Excess Fat: Sounds tedious, but it’s worth it: trimming the visible fat off the thighs keeps the sauce from turning greasy and helps it cling better to the meat.
  • Skip the Overcrowding: After my first attempt came out steamed instead of roasted, I now leave at least an inch between each thigh so the heat can circulate and crisp up the edges.
  • Simmer the Sauce: Reduce the teriyaki mixture on the stovetop for 3-4 minutes before slathering it on—this thickens it just enough to coat the chicken without sliding right off in the oven.

Make-Ahead Tips for Leftovers

Marinate Ahead

Combine the teriyaki glaze ingredients up to 24 hours before cooking. I mix the soy sauce, brown sugar, and aromatics, then store in an airtight container in the fridge. This not only saves time but also deepens the flavor complexity. 💡

Prep the Chicken

Pat the chicken thighs dry and trim any excess fat the night before. Store them in a sealed container with ¼ of the teriyaki glaze for marinating. This ensures even flavor distribution and reduces day-of prep time.

Glaze Storage

The prepared teriyaki glaze keeps for up to 1 week in the refrigerator. I often make a double batch, using half for the recipe and saving the rest for future meals. Just reheat gently before using.

Baking Sheet Prep

Line your baking sheet with parchment paper and grease it lightly with vegetable oil up to 12 hours ahead. Cover with foil to keep it dust-free. This small step makes the cooking process smoother on busy days.

Garnish Ready

Slice the green onions and toast the sesame seeds up to 2 days in advance. Store them separately in the fridge and at room temperature, respectively. This ensures fresh, crisp garnishes when serving. ✨

Reheating Leftovers

Store cooked chicken in an airtight container for up to 3 days. To revive, place on a baking sheet, brush with a little extra glaze, and broil for 2-3 minutes to restore the sticky finish.

Nutrition Facts

Servings 4
Amount Per Serving
Calories 480kcal
% Daily Value
Total Fat 18g23%
Saturated Fat 4g20%
Cholesterol 145mg48%
Sodium 1200mg52%
Total Carbohydrate 42g15%
Dietary Fiber 1g4%
Sugars 38g
Protein 34g68%
Percent Daily Values are based on a 2,000 calorie diet. Your daily values may be higher or lower depending on your calorie needs.

Frequently Asked Questions

1

What temperature should the oven be set to?

Bake at 400°F for the first 20 minutes, then finish under the broiler. This ensures even cooking while achieving that signature caramelized glaze.

2

Can I use chicken breasts instead of thighs?

You can, but reduce baking time by 5-7 minutes as breasts cook faster. Thighs stay juicier and are more forgiving, though. Keep an eye on internal temp to avoid dryness.

3

How do I prevent the glaze from burning?

If it darkens too quickly, tent the pan with foil. The final 2-3 minute broil should be watched closely. Always reserve some glaze for a fresh top coat.

4

Can I make this ahead for meal prep?

Store cooked chicken in an airtight container for up to 3 days. Reheat by broiling briefly to restore the sticky finish.

★★★★★4.9(11 reviews)
Tyler Campbell